Visar inlägg med etikett Gör det själv - DIY. Visa alla inlägg

19 okt. 2010

Lekfilt! / Playblanket

 Mycket praktiskt för alla småbarnsföräldrar där ute! :)
Very convenient for all you parents with small children out there! :)

Med fleecefodrad baksida är filten skön att sitta på och fiskmönstret inbjuder till glada lekar med plastvalar, grodor och delfiner, och leksakerna stannar faktiskt kvar på filten.
 With fleece lining in the back of the blanket it is comfortable to sit on, and fish pattern invites to joyfull playing, with plastic whales, frogs, and dolphins, and the toys actually stay on the blanket.


 Du behöver: Tyg, en eller två bitar ungefär 150x150 cm, (varav en bit i fleece). Rep, cirka 7 meter (tygbredden x 4 plus minst 50 cm). Tråd, sax, tejp samt symaskin
You need: Fabric, one or two pieces of approximately 150x150 cm, (one of them fleece). Rope, about 7 meters (Fabric width x 4 plus 50 cm). Thread, scissors, tape and sewing machine

Gör så här: 1. Börja med att nåla fast tygbitarna, avigsidan mot varandra och klipp till dem i samma storlek.
 Follow these steps: 1. Start by pinning the fabric together, wrong sides against each other and cut them into the same size.
 2. Vik in ytterkanterna mot varandra cirka 1-2 centimeter (du behöver inte sicksacka) och nåla fast.
 2. Fold the outer edges in towards each other about 1-2 inches (you dont have to zigzag) and pin together.

 3. Sy först ihop längs kanten nästan helt runt om, och sedan en gång till cirka 3-4 centimeter in på tyget.
 3. First sew together along the first edge almost completely around, and then again about 3-4 inches into the fabric.
 4. Det är viktigt att du lämnar cirka tre centimeter i ena hörnet för att kunna trä in och ut repet.
 4. It is important that you leave about three inches in one corner so you can enter the rope into the channel.

 5. Trä in repet med hjälp av exempelvis en bit ståltråd som är lätt att greppa genom tyget. Knyt och tejpa ändarna. Färdigt!
5. Thread the rope through the channel with help of a, for exampel, wire that is easy to grasp through the fabric. Tie and tape the ends. Done!

När leken är över och det är dags att städa snörps filten ihop till en praktisk påse som hängs på en krok på väggen.
When playtime is over and it's time to clean, you just need to pucker it all together and hang it on a small hook on the wall.

18 okt. 2010

Sy gardin snabbt! / Sew a curtain fast!

Jag skall fixa till en egen rullgardin till lilla fönstret i sovrummet. Dels för att jag inte känner för att lägga ut massor av pengar på en färdig, dels för att jag känner att det kommer vara roligt. Så nu hittade jag ett snabbt och enkelt sätt att göra en, och detta ska jag nu dela med mig av:
I'm gonna fix my own drop-downcurtain for the small window in the bedroom. Partly because I dont feel like spending a ton of money on a ready-made one, partly because I feel it will be fun. So, now I found a quick and easy way to make one, and this I will now share with you:


Det här behövs:
 • Tyg
• Träribba i fönstrets mått
• Bomullsband
• Häftpistol
• Små krokar för upphängning


Gör så här:Mät och fålla tygbiten. Nita fast tyget på träribban. Skruva fast krokar för upphäng. Två i ribban och två i fönsterfodret. Sy fast bomullsband upptill. Fäst både på fram- och baksida. Rulla upp tyget och knyt en rosett i var ände. Färdigt! Har du redan en stång i fönstret kan du så klart sy en kanal istället för att häfta fast tyget på en träribba.

This is what you need:
Fabric
Wood lath in the window's dimension
Cotton tape
Staple Gun
Small hooks for hanging

Follow these steps: 

Measure and hem the fabric. Staple the fabric on to the wood lath. Screw the hooks to the wall for hanging of the curtain, two in the lath  and two over the window. Sew the cotton tape on top, attach on both front and rear side. Roll up the fabric and tie a bow at each end. Done!
Already have a pole in the window, you can of course sew a channel instead of stapling the fabric on to the wood lath.

www.viivilla.se

15 okt. 2010

Ny tvättstuga / New laundryroom

Vem vill inte ha en tvättstuga där allt är organiserat och snyggt? Om man ska orka sig genom högarna av tvätt vill man ju gärna att det ska vara i en stilren tvättstuga, som man trivs i.
Om man inte har råd med nya skåp så kan man ju slipa och måla om de man redan har. Men i det exempel jag ska visa är allt dock nytt, så låt er inspireras! :)
Who doesn't want a laundryroom where everuthing is organized and nice? If you are to go through that big pile of laundry you want to do so in a clean laundryroom, which you enjoy.
If you don't ave the money to buy new cabbinets then you can paint your old ones. But in the exampel I'm gonna show you everything is new, so be inspired! :)

FÖRE:
BEFORE:


EFTER:
AFTER:
Skåpen heter Ärlig och kommer från Ikea. Tvättmaskin och torktumlare, Miele Novotronic. Korgar och handdukar från Åhlens. Dammsugare, Electrolux Ergorapido.
Cabbinets "Ärlig" from Ikea. Washing machine and tumbledryer, Miele Novotronic. Basktes and towels from Åhlens. Vacuumcleaner, Electrolux Ergorapido.

Bilder lånade från viivilla.se
Pictures borrowed from viivilla.se

Platsbyggd hylla / Fitted bookshelf

Har du många böcker utspridda över huset? Varför inte placera dem på en hel vägg? Det gör att det ser mer organiserat och genomtänkt ut. Hur du bygger denna hylla hittar du HÄR (klick).
Do you have a lot of books all over the house? Why not place them on an intire wall? That makes it look more organised and thought thrue. How you build this exact  bookshelf you'll find HERE (klick) (swedish)

12 okt. 2010

Billig tygtavla! / Inexpensive fabric painting

Denna ska jag göra någon dag:
I'm gonna make one of these someday:
 Hur du gör hittar du HÄR (klick)
You'll find the "how to" HERE (in swedish)

Lång dag! / Long day!

Idag har jag:
1.Städat
2. Räfsat
3. Rätt upp bakgården
4.Sytt matta
5.Lagat mat
6. Fixat lyktor
7.Ätit MASSVIS med godis
8. Städat balkongen
9.Tvättat
10. Lyssnat på dålig karaoke från tv-programmet FÄRJAN 3
11. Tagit massor av foton
12. Inspirations-surfat
13. Slipat soffbordet inför målning
m.m m.m m.m m.m.....

Today I have:
1. Cleaned the house
2. been raking leaves
3. Cleaned the yard
4. Sewed a carpet
5. Made food
6.Fixed the oil lamps
7. Eaten A LOT of candy
8.Cleaned the balcony
9. Washed clothes
10.listened to bad karaoke from the tv program FÄRJAN 3
11. Taken A LOT of photos
12. Searched for inspiration
13. Made the coffee table ready for painting
and so on...


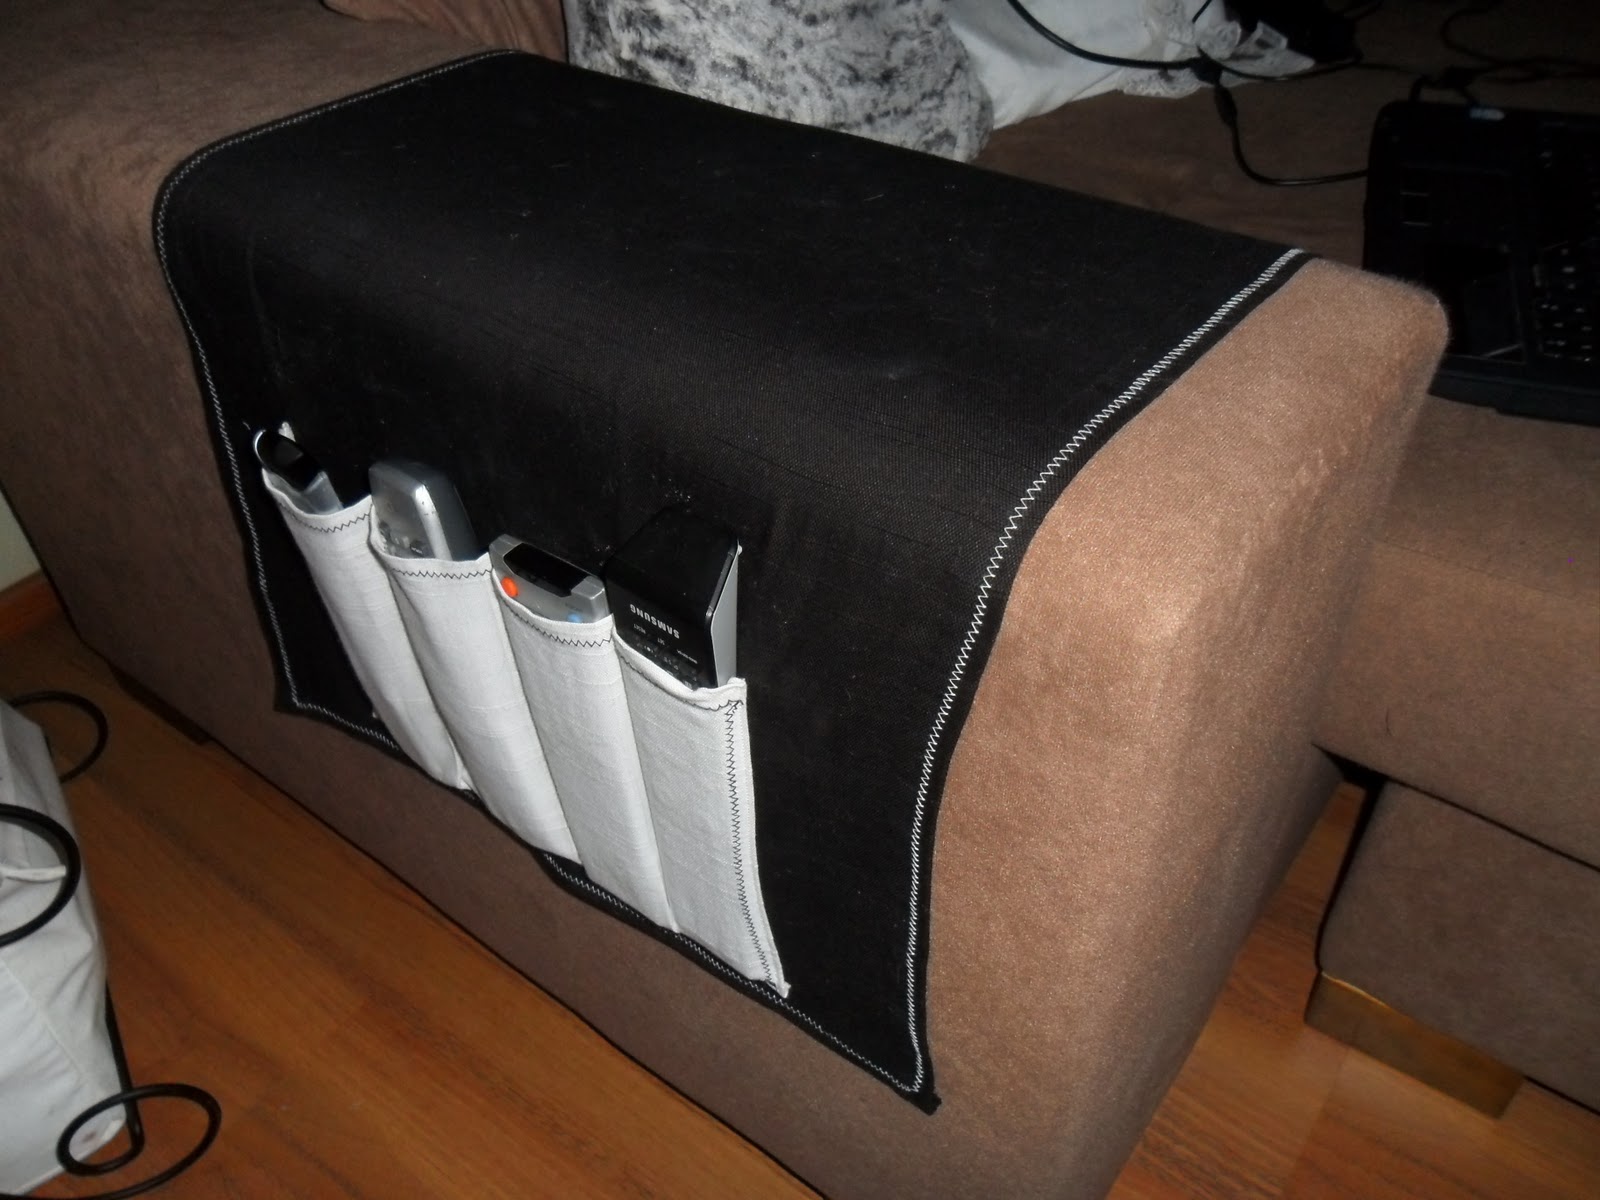
 Nu tänker jag slänga upp bilder på kontrollfickan jag gjorde på sambons begäran! ;)
Now I'm gonna put up pictures of the remotepocket I made because my boyfriend asked me to! ;)


11 okt. 2010

Gratis lyktor! / Free lamps

Jag "hittade" två gamla, rostiga oljelyktor som jag gjorde om! (förra grannarna lämnade dem efter att de flyttade). De var i så dåligt skick, att de föll sönder när jag tog bort glasen.

I "found" two old, rosty oil lamps that I made as good as new again! (the old neighbours left them behind when they moved). They were in such a bad shape, that when I removed the glass, they fell apart.


FÖRE:
BEFORE:


EFTER:
AFTER: 
Jag ska måla dem en gång till, men jag var så ivrig att få dem på bild! ;)
I will paint them one more time, but I was in such a hurry to take a picture of them! ;)

2€ farstumatta / 2€ entrance carpet


Extremt simpelt som vem som helst skulle komma på, men jag sätter upp det iallafall eftersom detta är vad jag sysselsatt mig med idag! :)

Extremely simple that anyone could think of, but this is what I've been doing today, so I put it here anyway! :)


Detta använde jag:
This is what I used:
Fyra mattor från Jysk 0,50€/st
Nål, tråd, sax
Four carpets from Jysk 0,50€ each
Needle, thread, scissors


Klipp bort de rundade hörnen
Cut off the rounded corners


Välj ditt "mönster"
Choose your "pattern"


Tråckla ihop
Baste


Klipp i önskad form (jag rundade endast hörnen)
Cut into desired shape (I only rounded the corners)

Och du är färdig! :)
And you are done! :)

9 okt. 2010

Sprakande boll / sparkleball

Denna är gjord av plastmuggar och en ljusslinga..
This is made out of plasticcups and chasing lights..

Se "hur" HÄR (klick) (engelska)
Watch the "how to" HERE (klick) (in english)

8 okt. 2010

Dagens projekt! / Project of the day!

Detta använde jag:
This is what I used:


Vek tyget dubbelt och nålade fast mallen på hur bred jag ville ha "rosetten" (klippte ut från smörpapper)

Folded the fabric doubble, then I pinned the template to the fabric (I got the template by cutting it from an greaseproof paper)


Klipp ut..
Cut..


Sy ihop hela - förutom en liten öppning..
Sew the whole thing together except from a small opening..

Vänd tyget ut och in!
Turn the fabric inside out!


Sy ihop den
Sew together


Pressa kanterna
Press edges


 Sydde en dragkedja i bakstycket
Sewed in a zipper in back of the pillow


Nålade fast "rosetten" i framstycket
Pinned the "bow" to the front side of  the pillow


Nålade rät mot rät sida, sydde ihop och svängde ut och in.
Pinned right against right-side, sewed them together and then flipped it inside out.


Knöt ett band runt mitten  av "rosetten"
Tied a ribbon around the middle of the "bow"


Färdigt!
Done!

Min första alldeles egna skjorta! / My first very own shirt!


Mitt absolut första klädesplagg NÅGONSIN är färdigt! :)
My very first articel of clothing  EVER is finished! :)


FÖRE:
BEFORE: 

 EFTER:
AFTER:


 Framifrån
From the front


Bakifrån 1
From the back 1


Bakifrån 2
From the back 2

 Och från sidan
And from the side


Vad tycks?
So, what do you think?

7 okt. 2010

Jag har ett projekt.. / I have a project..

..men jag tänker inte säga exakt VAD..
..but I'm not gonna tell you exactly what it is..

 Men här är en hint:
But here is a hint:

6 okt. 2010

Äntligen något för hyreslägenheter! /Finally something for rent apartments


 Är det inte snyggt?
Isn't it nice?


Detta behöver du:
This is what you need:

Tom vägg
Empty wall


Dessa verktyg
These tools


Börja med ramen
Start with the frame


Fortsätt med önskat mönster
Continue with the pattern you want


Färdig!
Done!

More pictures from this - click HERE

5 okt. 2010

Lysande bokstäver/ Shining letters

Bokstäver är väldigt stort inom inredning just nu och även lampor av alla de slag, så varför inte slå ihop dessa två?

Letters is everywhere  you look right now and also various lights of all kinds, so why not put the two together?

 Borra små hål i bokstäverna, peta in små led-lampor i hålen och häng upp på väggen, FÄRDIGT!
Snabbt, enkelt, snyggt och billigt! Precis som det skall vara! :)

Drill small holes in the letters, put a light in each hole and hang to the wall, DONE!
Quick, easy, beautiful and inexpensive! Exactly how it should be! :)

Från sängar till STOR soffa/ From beds to couch

Istället för att köpa en stor, dyr, ny soffa, varför inte bygga en egen av 2 gamla sängar?
Enkelt, snyggt och billigt!

Instead of buying a huge, expensive, new couch, why not build your own with 2 old beds?
Easy, beautiful and cheap!

Klicka HÄR för att se hur du skall gå tillväga..
Klick HERE (swedish) to see how it's made..

Hade vi inte bott så trångt hade jag gjort det här för länge sen, köp två lika breda sängar på en loppmarknad eller gamla som ligger och skräpar hos någon, byt ut fötterna och köp nya madrass och VIPS har du en billig, STOR soffa som alla ryms i!
Tips: Vill du ha en hörn soffa kan du ju bara svänga på den ena sängen, eventuellt ta en barnsäng som "divan-del"! :)

If our appartment  wasn't as small as it is I would have made it a long time ago, buy two beds that are equally wide from a fleamarket or old ones from someone who doesn't want them anymore, change the feet, buy new matresses and SWISH - you now have a HUGE couch which makes room for everyone!
Tip: If you want a corner-couch you can only turn one of the beds, or if you want an divancouch you can make it out of a childrensbed! :)